How Controllers, Services, Routes, Middleware, and the Database Work Together Using TaskFlow API
When building a backend application, writing code is only one part of the job. Another important part is organising that code so that the application remains understandable, maintainable, testable, and easy to extend.
Imagine building TaskFlow, a task management application where users can register, log in, create projects, assign tasks, update task statuses, and manage their work.
As the application grows, putting all the code into one file quickly becomes difficult to manage.
You might have authentication logic, database queries, task creation, request validation, and error handling sitting together in a single file. Changing one feature could accidentally affect another.
This is where software architecture and separation of concerns become important.
In this article, we'll explore how the TaskFlow backend is organised, what each component is responsible for, and how they communicate to process a user's request.
We'll use Node.js, Express, and PostgreSQL in our examples.
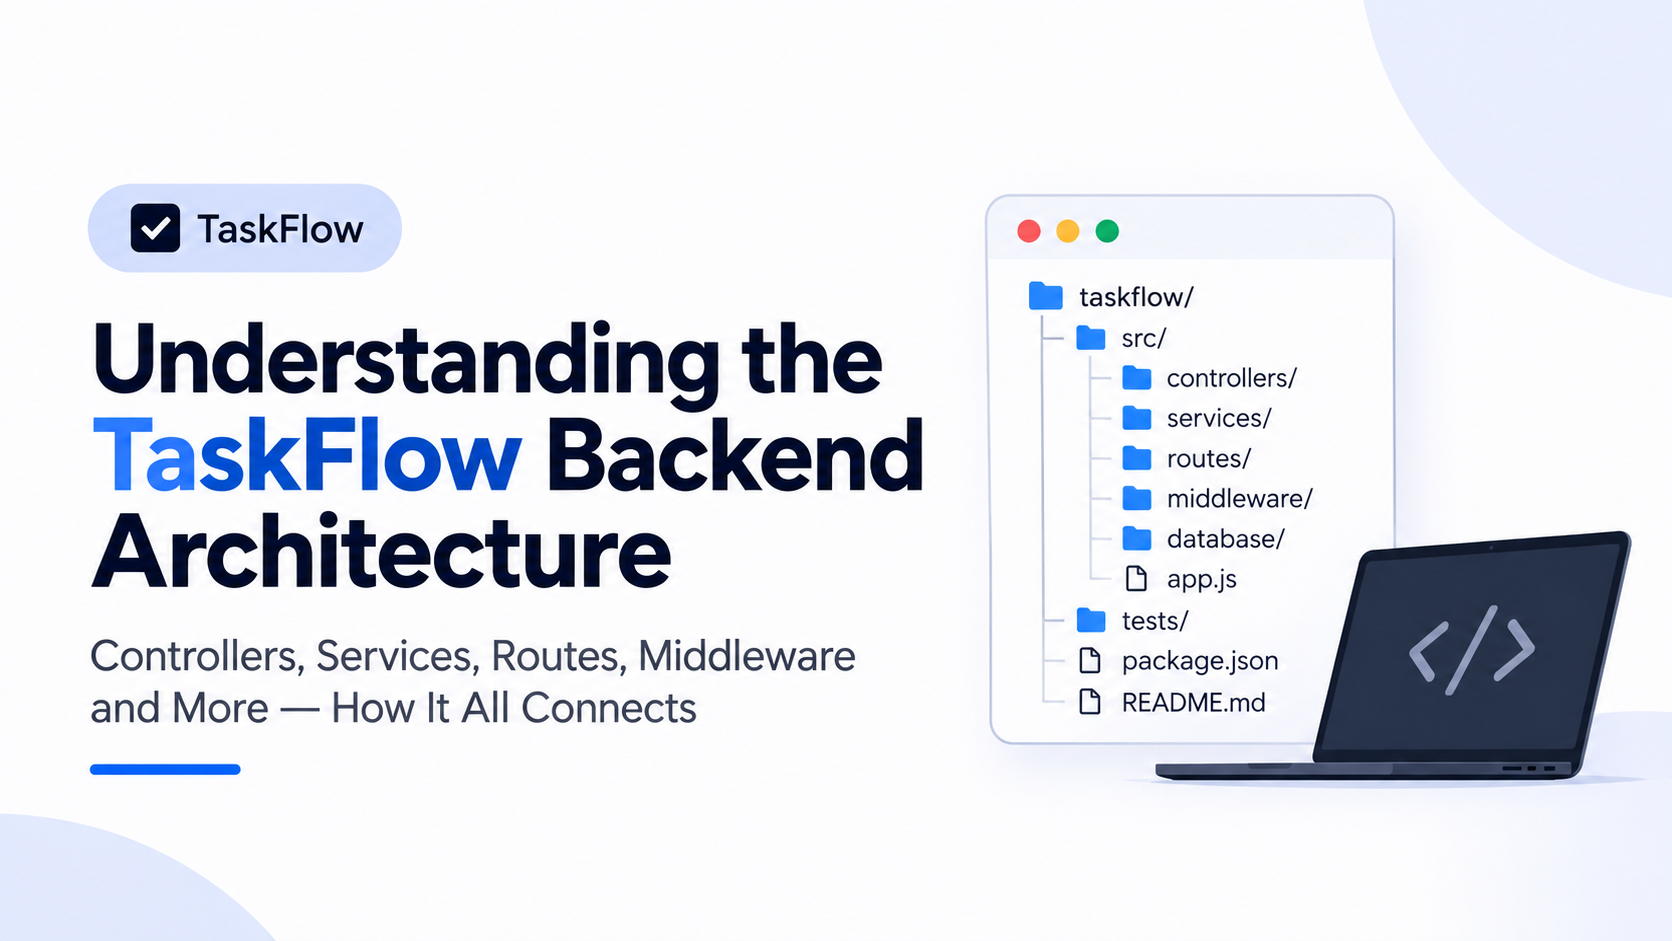
1. Understanding the TaskFlow Project Structure
Let's start with our project directory:
taskflow/
│
├── src/
│   ├── controllers/
│   ├── services/
│   ├── routes/
│   ├── middleware/
│   ├── database/
│   └── app.js
│
├── tests/
├── package.json
└── README.md
This structure follows a layered approach to backend development.
Rather than allowing every part of the application to perform every task, we assign specific responsibilities to different components.
Here's what each directory is responsible for:
- controllers/: Handle incoming HTTP requests and send responses.
- services/: Contain the application's business logic.
- routes/: Define the API endpoints and connect them to their controllers.
- middleware/: Perform operations such as authentication, validation, and error handling before or after requests reach controllers.
- database/: Manage database connections, queries, and database-related operations.
- app.js: Configures the Express application and brings the different components together.
- tests/: Contain automated tests that verify the application behaves as expected.
- package.json: Defines project dependencies, metadata, and scripts.
- README.md: Explains what the project does and how developers can install, configure, and run it.
Let's examine these components individually.
2. Routes: Defining How Users Interact With the API
Imagine a user wants to create a new task in TaskFlow.
The application needs a way to recognise that request and determine which part of the backend should handle it.
That's the responsibility of routes.
A route defines an API endpoint and the HTTP method associated with it.
For example:
POST /api/v1/tasks
This endpoint tells the application that someone wants to create a new task.
Other examples include:
POST   /api/v1/auth/register
POST   /api/v1/auth/login

GET    /api/v1/projects
POST   /api/v1/projects

GET    /api/v1/tasks
POST   /api/v1/tasks
PATCH  /api/v1/tasks/:taskId
DELETE /api/v1/tasks/:taskId
Each endpoint represents a particular operation the API supports.
Creating a route in Express
Inside src/routes/task.routes.js, we could write:
const express = require("express");

const router = express.Router();

const taskController = require("../controllers/task.controller");

router.post("/", taskController.createTask);

router.get("/", taskController.getTasks);

router.patch("/:taskId", taskController.updateTask);

router.delete("/:taskId", taskController.deleteTask);

module.exports = router;
Let's understand what's happening.
express.Router()creates a separate router for organising related endpoints.router.post()defines an endpoint that responds to POST requests.router.get()defines an endpoint that responds to GET requests.router.patch()defines an endpoint that responds to PATCH requests.router.delete()defines an endpoint that responds to DELETE requests.taskController.createTaskconnects the endpoint to the function responsible for handling that operation.
Notice something important: the route does not contain the actual task creation logic.
It simply tells Express which controller should handle a particular request.
Think of routes as receptionists. They receive requests, identify what the visitor needs, and direct them to the appropriate department.
3. Controllers: Handling Requests and Responses
After a request matches a route, it is passed to the appropriate controller.
The controller acts as the intermediary between the incoming HTTP request and the application's business logic.
Its responsibilities include:
- Receiving request information.
- Extracting data from request parameters, headers, and request bodies.
- Calling the appropriate service function.
- Receiving the result from the service.
- Returning an appropriate HTTP response.
Let's consider our task creation example.
A user sends the following request:
POST /api/v1/tasks
Content-Type: application/json
Request body:
{
  "title": "Write API documentation",
  "description": "Document the TaskFlow endpoints",
  "status": "pending"
}
The controller receives this information and passes it to the service.
Inside src/controllers/task.controller.js:
const taskService = require("../services/task.service");

async function createTask(req, res, next) {
  try {
    const task = await taskService.createTask(
      req.body,
      req.user.id
    );

    return res.status(201).json({
      message: "Task created successfully",
      data: task
    });

  } catch (error) {
    next(error);
  }
}

module.exports = {
  createTask
};
Let's break this down.
1. Receiving the request
async function createTask(req, res, next)
Express provides three important objects here:
req: Contains information about the incoming request.res: Provides methods for sending a response.next: Passes control to the next middleware or error handler.
2. Passing information to the service
const task = await taskService.createTask(
  req.body,
  req.user.id
);
The controller passes two things to the service:
req.body: Contains the task information submitted by the user.req.user.id: Identifies the authenticated user.
The req.user property will be populated by our authentication middleware, which we'll examine later.
3. Returning the response
return res.status(201).json({
  message: "Task created successfully",
  data: task
});
If the operation succeeds, the controller returns HTTP status code 201 Created alongside the newly created task.
4. Handling errors
catch (error) {
  next(error);
}
If something goes wrong, the error is passed to Express's error-handling middleware.
The controller doesn't need to know how the database stores tasks or how the application validates business rules.
Its primary responsibility is handling HTTP communication.
4. Services: Where Business Logic Lives
This is one of the most important parts of our architecture.
Services contain the business logic that determines how the application behaves.
Let's say a user wants to create a task.
Creating a task might involve several rules:
- The task must have a title.
- The task must belong to an existing project.
- The user must have permission to create tasks in that project.
- The task must be associated with the correct user or project.
- The task must be saved in the database.
These are application-level responsibilities.
Rather than placing all this logic inside the controller, we put it inside the service layer.
Inside src/services/task.service.js:
const taskDatabase = require("../database/task.database");

async function createTask(taskData, userId) {

  const project = await taskDatabase.findProjectById(
    taskData.projectId
  );

  if (!project) {
    throw new Error("Project not found");
  }

  if (project.user_id !== userId) {
    throw new Error("You cannot create tasks in this project");
  }

  const task = await taskDatabase.createTask({
    ...taskData,
    userId
  });

  return task;
}

module.exports = {
  createTask
};
Let's understand what the service does.
First, it checks whether the project exists.
const project = await taskDatabase.findProjectById(
  taskData.projectId
);
The service asks the database layer to retrieve the project.
Second, it checks whether the project exists.
if (!project) {
  throw new Error("Project not found");
}
If the project doesn't exist, the operation cannot continue.
Third, it checks ownership.
if (project.user_id !== userId) {
  throw new Error("You cannot create tasks in this project");
}
A user should not be allowed to create tasks inside another user's private project.
Finally, it creates the task.
const task = await taskDatabase.createTask({
  ...taskData,
  userId
});
The service passes the task information to the database layer.
The database layer performs the actual database operation.
Why separate services from controllers?
Imagine we eventually introduce another way to create tasks, perhaps through a scheduled background process.
We can reuse the same task creation service without duplicating all the business rules.
This is one of the benefits of separation of concerns.
Controllers manage HTTP communication. Services manage application behaviour.
5. Database: Managing Application Data
TaskFlow needs somewhere to store information.
For example:
- User accounts.
- Projects.
- Tasks.
- Task descriptions.
- Task statuses.
- Creation and update timestamps.
We'll use PostgreSQL as our relational database.
However, our application needs a way to communicate with PostgreSQL.
That's where the database layer comes in.
The database/ directory is responsible for database connectivity and data persistence.
It can contain:
- Database connection configuration.
- Database query functions.
- Database schema definitions.
- Database migrations.
For our example, let's create a connection file.
src/database/connection.js
const { Pool } = require("pg");

const pool = new Pool({
  connectionString: process.env.DATABASE_URL
});

module.exports = pool;
Here is what's happening.
const { Pool } = require("pg");
We import Pool from the PostgreSQL package called pg.
A connection pool manages multiple database connections so that the application can reuse them instead of creating a completely new connection for every query.
Next:
const pool = new Pool({
  connectionString: process.env.DATABASE_URL
});
We create a connection pool using the database connection string stored in an environment variable.
Now let's create the database operations for tasks.
src/database/task.database.js
const pool = require("./connection");

async function createTask(taskData) {

  const query = `
    INSERT INTO tasks (title, description, status, user_id, project_id)
    VALUES ($1, $2, $3, $4, $5)
    RETURNING *
  `;

  const values = [
    taskData.title,
    taskData.description,
    taskData.status,
    taskData.userId,
    taskData.projectId
  ];

  const result = await pool.query(query, values);

  return result.rows[0];
}

module.exports = {
  createTask
};
Let's examine an important part:
INSERT INTO tasks (title, description, status, user_id, project_id)
VALUES ($1, $2, $3, $4, $5)
RETURNING *
This SQL statement instructs PostgreSQL to insert a new record into the tasks table.
The $1, $2, $3, $4, and $5 are parameter placeholders.
The actual values are supplied separately:
const values = [
  taskData.title,
  taskData.description,
  taskData.status,
  taskData.userId,
  taskData.projectId
];
This approach uses parameterized queries, which helps protect the application against SQL injection.
Finally:
return result.rows[0];
PostgreSQL returns the newly created record, and we return it to the service.
The service then passes the result to the controller, which sends it back to the user.
Notice how the components depend on one another without taking over each other's responsibilities.
6. Middleware: Performing Checks Before Requests Reach Controllers
Middleware is another important part of Express applications.
A middleware function is a function that runs during the request-response cycle.
It can inspect incoming requests, perform checks, modify request information, terminate requests, or pass control to the next middleware.
TaskFlow will need middleware for several purposes:
- Authentication.
- Request validation.
- Error handling.
- Security.
- Rate limiting.
Let's use authentication as an example.
Imagine a user wants to retrieve their private tasks.
Before allowing access, TaskFlow needs to establish whether the user is authenticated.
We can create an authentication middleware.
src/middleware/auth.middleware.js
const jwt = require("jsonwebtoken");

function authenticateUser(req, res, next) {

  const authHeader = req.headers.authorization;

  if (!authHeader || !authHeader.startsWith("Bearer ")) {
    return res.status(401).json({
      message: "Authentication required"
    });
  }

  const token = authHeader.split(" ")[1];

  try {
    const decoded = jwt.verify(
      token,
      process.env.JWT_SECRET
    );

    req.user = decoded;

    next();

  } catch (error) {
    return res.status(401).json({
      message: "Invalid or expired token"
    });
  }
}

module.exports = authenticateUser;
Let's break this down.
1. Retrieve the authorization header.
const authHeader = req.headers.authorization;
The middleware checks whether the request contains an authorization header.
A valid request might contain:
Authorization: Bearer eyJhbGciOiJIUzI1NiIs...
2. Verify that a token exists.
if (!authHeader || !authHeader.startsWith("Bearer ")) {
If the authorization header is missing or does not contain a Bearer token, the request is rejected.
3. Extract the token.
const token = authHeader.split(" ")[1];
This extracts the actual token from the authorization header.
4. Verify the token.
const decoded = jwt.verify(
  token,
  process.env.JWT_SECRET
);
The application verifies the token using its secret key.
5. Attach the authenticated user's information to the request.
req.user = decoded;
This makes the authenticated user's information available to subsequent middleware and controllers.
6. Allow the request to continue.
next();
The next() function passes control to the next middleware or route handler.
If authentication fails, the request is rejected before reaching the controller.
Connecting middleware to routes
We can apply the authentication middleware to our task routes:
const express = require("express");

const router = express.Router();

const taskController = require("../controllers/task.controller");

const authenticateUser = require("../middleware/auth.middleware");

router.post(
  "/",
  authenticateUser,
  taskController.createTask
);

router.get(
  "/",
  authenticateUser,
  taskController.getTasks
);

module.exports = router;
Now, whenever someone sends a request to these endpoints, the authentication middleware runs before the controller.
This means unauthenticated users cannot access these protected operations.
7. app.js: Bringing Everything Together
So far, we've examined several independent components.
But how does Express know about them?
How do all these routes become available to users?
How does the application know which middleware to execute?
That's the responsibility of app.js.
The app.js file serves as the central configuration point for our Express application.
It is responsible for:
- Creating the Express application.
- Registering global middleware.
- Connecting application routes.
- Registering error-handling middleware.
- Exporting the configured application.
Let's look at an example.
src/app.js
const express = require("express");

const taskRoutes = require("./routes/task.routes");

const app = express();

// Parse incoming JSON requests
app.use(express.json());

// Register task routes
app.use("/api/v1/tasks", taskRoutes);

// Handle unknown routes
app.use((req, res) => {
  res.status(404).json({
    message: "Route not found"
  });
});

// Global error handler
app.use((err, req, res, next) => {
  console.error(err);

  res.status(500).json({
    message: "Internal server error"
  });
});

module.exports = app;
Let's understand the sequence.
First, we create the Express application.
const app = express();
This creates our application instance.
Second, we register JSON parsing middleware.
app.use(express.json());
This allows Express to understand JSON request bodies.
Without it, req.body may not contain the JSON data submitted by a user.
Third, we register our task routes.
app.use("/api/v1/tasks", taskRoutes);
This tells Express that requests beginning with /api/v1/tasks should be handled by the task router.
Remember that our task router already contains:
router.post("/", taskController.createTask);
When combined with the base path, the complete endpoint becomes:
POST /api/v1/tasks
Finally, we register error-handling middleware and export the application.
Notice that the application configuration does not contain task creation logic, authentication logic, or SQL queries.
It simply brings the different parts of the application together.
One additional distinction: app.js creates and configures the application, while a separate server.js file can be responsible for starting the HTTP server and listening on a port.
8. Tests: Making Sure the Application Works
Writing code does not automatically mean the application works correctly.
We need a way to verify that each component behaves as expected.
That's why we have the tests/ directory.
It contains automated tests that check the behaviour of our application.
For example, when creating a task, we should verify that:
- A valid request creates a task.
- A request without a title is rejected.
- An unauthenticated user cannot create a task.
- A user cannot create a task inside another user's private project.
- An invalid project ID produces an appropriate error.
We can write an integration test using Jest and Supertest.
For example:
const request = require("supertest");

const app = require("../src/app");

describe("Task API", () => {

  it("should reject unauthenticated requests", async () => {

    const response = await request(app)
      .post("/api/v1/tasks")
      .send({
        title: "Write API documentation",
        status: "pending"
      });

    expect(response.status).toBe(401);

  });

});
Let's understand the test.
request(app)
Supertest allows us to send HTTP requests to our Express application.
.post("/api/v1/tasks")
We simulate a POST request to the task creation endpoint.
.send({
  title: "Write API documentation",
  status: "pending"
});
We provide the request body.
Finally:
expect(response.status).toBe(401);
We check that the application returns HTTP 401 Unauthorized because the request does not contain a valid authentication token.
This is an integration test because it tests how multiple parts of the application work together through an HTTP request.
We can also write unit tests for individual service functions.
9. package.json: Managing Project Dependencies and Scripts
Every Node.js project has a package.json file.
It contains important information about the project, including:
- Project name and version.
- Installed dependencies.
- Development dependencies.
- Available scripts.
For TaskFlow, our package.json might look like this:
{
  "name": "taskflow",
  "version": "1.0.0",
  "description": "A task management REST API",
  "main": "src/app.js",
  "scripts": {
    "start": "node server.js",
    "dev": "nodemon server.js",
    "test": "jest"
  },
  "dependencies": {
    "express": "^5.0.0",
    "pg": "^8.0.0",
    "jsonwebtoken": "^9.0.0",
    "bcrypt": "^5.0.0",
    "dotenv": "^16.0.0"
  },
  "devDependencies": {
    "jest": "^30.0.0",
    "supertest": "^7.0.0",
    "nodemon": "^3.0.0"
  }
}
Some important distinctions:
Dependencies
These are packages required by the application to function.
For example:
- Express handles HTTP requests.
pgallows Node.js to communicate with PostgreSQL.jsonwebtokenhandles JWT operations.bcrypthelps hash passwords.dotenvloads environment variables.
Development dependencies
These are packages primarily used during development and testing.
For example:
- Jest runs automated tests.
- Supertest tests HTTP endpoints.
- Nodemon automatically restarts the development server when files change.
We can run the application using:
npm run dev
And run our tests using:
npm test
10. README.md: Helping Other Developers Understand the Project
Imagine another developer discovers TaskFlow on GitHub.
They clone the repository but have no idea what the application does, what technologies it uses, or how to run it.
The README.md file helps solve that problem.
It serves as the project's introduction and setup guide.
A good TaskFlow README should contain:
Project Overview
Explain what TaskFlow does and the problem it solves.
Technology Stack
List the technologies used:
- Node.js
- Express
- PostgreSQL
- JWT
- Jest
- Supertest
Installation Instructions
Explain how to clone the repository and install dependencies.
git clone <repository-url>

cd taskflow

npm install
Environment Configuration
Explain which environment variables developers need.
For example:
PORT=3000

DATABASE_URL=postgresql://username:password@localhost:5432/taskflow

JWT_SECRET=your_secret_key
The README should explain how to configure these values without exposing actual credentials.
Running the Application
npm run dev
Running Tests
npm test
API Documentation
Provide a link or reference to the API documentation.
The README is particularly important for collaboration because it helps new contributors understand how to get the application running.
11. How Everything Connects: Following a Request Through TaskFlow
We've examined the individual components.
Now let's bring everything together.
Imagine Samuel logs into TaskFlow and wants to create a new task called:
Write API Documentation.
What happens behind the scenes?
Let's follow the request.
Step 1: The user sends a request
The user submits:
POST /api/v1/tasks
With the following JSON body:
{
  "title": "Write API Documentation",
  "description": "Document all TaskFlow endpoints",
  "status": "pending",
  "projectId": 1
}
The request also contains an authentication token.
Step 2: Express receives the request
The Express application configured in app.js receives the request.
It parses the incoming JSON and identifies the matching route.
Step 3: The route identifies the controller
The request matches:
router.post(
  "/",
  authenticateUser,
  taskController.createTask
);
The route establishes which middleware and controller should handle the request.
Step 4: Middleware verifies authentication
The authentication middleware extracts and verifies the JWT.
If the token is invalid, the request is rejected.
If authentication succeeds, the user's information is attached to req.user.
Step 5: The controller receives the request
The controller extracts the request body and authenticated user's ID.
It passes this information to the task service.
Step 6: The service executes the business logic
The service checks whether the project exists and whether the authenticated user owns it.
If the checks pass, it asks the database layer to create the task.
Step 7: The database stores the task
The database layer executes an SQL INSERT statement.
PostgreSQL stores the new task and returns the created record.
Step 8: The result travels back to the user
The database returns the task to the service.
The service returns it to the controller.
The controller sends an HTTP response to the user.
For example:
{
  "message": "Task created successfully",
  "data": {
    "id": 15,
    "title": "Write API Documentation",
    "description": "Document all TaskFlow endpoints",
    "status": "pending",
    "project_id": 1
  }
}
The response has an HTTP status code of:
201 Created
Visualising the Request Flow
The architecture can be represented as follows:
              USER / CLIENT
                    |
                    |
              HTTP REQUEST
                    |
                    v
              src/app.js
                    |
                    v
                 ROUTES
                    |
                    v
               MIDDLEWARE
            (Authentication)
                    |
                    v
               CONTROLLERS
                    |
                    v
                 SERVICES
             (Business Logic)
                    |
                    v
                DATABASE
                    |
                    v
                PostgreSQL
                    |
                    |
              SAVED RECORD
                    |
                    v
                DATABASE
                    |
                    v
                 SERVICES
                    |
                    v
               CONTROLLERS
                    |
                    v
              HTTP RESPONSE
                    |
                    v
                USER / CLIENT
The important thing to understand is that requests generally move down through the architecture, while results move back up.
Each component performs its assigned responsibility before passing information to the next component.
12. Why Does This Architecture Matter?
You might be wondering why we cannot simply put everything inside app.js.
Technically, we could.
Express allows us to define routes, write business logic, execute database queries, and send responses inside one file.
However, that approach becomes difficult to maintain as the application grows.
Separating responsibilities provides several benefits.
1. Maintainability
If we need to change how tasks are created, we can focus on the task service instead of searching through hundreds of lines of unrelated code.
2. Reusability
A service can be called from different parts of an application.
For example, the same task creation service could be used by an HTTP controller or a background job.
3. Testability
We can test controllers, services, and other components independently.
This makes it easier to identify where something has gone wrong.
4. Scalability
As TaskFlow grows, we can introduce additional features without turning the application into one enormous collection of interconnected functions.
5. Collaboration
Remember that we're building TaskFlow as a team.
Having clearly defined responsibilities makes it easier to divide development work.
For example:
- Developer A can work on authentication, user controllers, and authentication services.
- Developer B can work on task and project controllers and services.
- Both developers can agree on route structures, database schemas, and API response formats before integrating their work.
This reduces unnecessary conflicts and makes code reviews easier.
Conclusion
The TaskFlow architecture demonstrates an important principle in backend development: every component should have a clear responsibility.
Let's summarise what we've learned:
- Routes determine which controller should handle an incoming API request.
- Middleware performs checks and other operations during the request-response cycle.
- Controllers receive HTTP requests, communicate with services, and return HTTP responses.
- Services contain the application's business logic.
- Database manages communication with PostgreSQL and data persistence.
- app.js configures the Express application and connects its components.
- Tests verify that individual components and the complete application behave correctly.
- package.json manages dependencies and project scripts.
- README.md explains the project and helps other developers get started.
One thing worth remembering is that these components are not separate applications. They are different parts of one application, designed to work together.
Understanding this architecture is important because, as we continue building TaskFlow, every new feature will interact with one or more of these components.
When we introduce authentication, pagination, filtering, project management, and task assignment, we'll have an organised structure in which to implement those features.
And more importantly, we'll be able to document each component, explain its behaviour, and help another developer understand how the entire system works.
Good backend architecture is not just about organising files. It's about organising responsibilities so that software remains understandable as it grows.
About the author
A meticulous Technical Writer with a keen eye for detail, specializing in crafting precise and user-friendly documentation. Dedicated to ensuring accuracy and clarity in all written materials to enhance user experience and comprehension.
Comments
Join the discussionNo comments yet. Be the first to comment.